Here’s a number that should make you pause: 14,000 people face a water damage emergency at home or work every single day. That’s not a misprint. And if you’re reading this right now, there’s a decent chance you’re one of them—standing in a puddle at 2 AM, phone in hand, heart racing.
I’ve been in the property restoration and building consulting space for over a decade, and the pattern is always the same. People discover water damage, they panic, they Google, and then they waste the most critical hours making avoidable mistakes. This guide exists to break that cycle. I’m going to walk you through the essential water damage repair steps you must follow—what to do first, what most articles get wrong, and the decisions that separate a $2,000 fix from a $25,000 catastrophe.
Water damage repair is the systematic process of extracting standing water, structurally drying affected materials, sanitizing contaminated surfaces, and restoring a property to its pre-loss condition. It works by combining rapid water removal with industrial dehumidification and moisture monitoring to prevent secondary damage like mold growth, which can begin colonizing surfaces within 24 to 48 hours of water exposure, according to the EPA and the CDC. As of 2025, water damage accounts for roughly 38% of the entire disaster restoration services market—a sector valued at over $43 billion globally.
Page Contents
Why Water Damage Repair Is More Urgent Than You Think
Water is patient. It doesn’t kick down your door like fire does. It seeps. It creeps. It saturates drywall behind your bathroom tile while you sleep, and by the time you spot the telltale ceiling stain, structural damage is already underway. That’s the insidious thing about water intrusion—the visible damage is almost always the tip of the iceberg.
The numbers tell a sobering story. According to , the United States recorded 27 billion-dollar weather and climate disasters in 2024 alone, racking up $182.7 billion in total costs. Water damage is the single largest category in the restoration industry, representing 38.56% of revenue share. Insurance industry data shows that water is responsible for roughly 45% of all interior property damage—more than fire and burglary combined.
But here’s the kicker: most water damage doesn’t come from dramatic floods or hurricanes. The Insurance Information Institute reports that the biggest culprits are mundane plumbing failures—burst pipes, failed supply lines, leaking water heaters. About 1 in 60 insured homes files a water damage claim each year, and the average payout now exceeds $11,000.
And the timeline? Brutal. Mold spores start colonizing damp surfaces in as little as 24 hours. By 48 hours, you’re likely dealing with active growth. Wait 18 to 21 days and you’ll see visible colonies that require professional remediation. Every hour you delay the essential water damage repair steps increases both cost and health risk.
I talked to a homeowner in Austin last year—let’s call her Maria—who discovered a slow leak behind her dishwasher on a Thursday evening. She put a towel down and figured she’d call someone Monday. By Monday, moisture had wicked two feet up the drywall, warped the subfloor, and kick-started a mold colony behind the kitchen cabinets. The original plumbing fix would have been around $400. Her final restoration bill? $18,200. That’s the cost of 72 hours of inaction.
The 6-Stage Water Damage Repair Process (What to Do and in What Order)
Every water damage restoration job follows a general sequence, but most articles oversimplify it into three or four vague steps. Real-world water damage repair involves six distinct stages, and the order matters more than people realize. Skip a stage or sequence them wrong, and you’ll either trap moisture inside your walls or expose yourself to contaminated water. Neither is great.
Stage 1: Safety Assessment and Water Shutoff
Before you touch a single thing, stop. Take five seconds and assess the scene. Is there standing water near electrical outlets? Can you smell gas? Is the ceiling bowing from trapped water? These aren’t hypothetical concerns—electrocution and structural collapse during water events are documented risks.
Your first move: shut off the water supply at the source. If you can’t find the source (or if it’s a sewage backup), shut off the main water valve to your house. Then kill the electricity to affected areas at the breaker panel. Don’t walk through standing water to reach the panel—if it’s in the flooded zone, call your utility company.
Pro Tip: Take photos and video of everything before you move or clean anything. Your insurance adjuster needs documentation of the damage in its original state. I’ve seen claims denied because homeowners cleaned up too aggressively before documenting the loss. Use your phone’s timestamp feature—it’ll be your best friend during the claims process.
Stage 2: Water Classification and Extraction
Not all water damage is created equal. The , the industry’s governing body, classifies water damage into three categories that dictate everything from PPE requirements to whether your carpet can be salvaged:
- Category 1 (Clean Water): Broken supply lines, overflowing sinks with no contaminants. Generally safe to handle yourself if the area is small.
- Category 2 (Gray Water): Dishwasher or washing machine overflows, toilet overflow with urine but no feces. Contains chemical or biological contaminants. Use gloves, boots, and eye protection.
- Category 3 (Black Water): Sewage backups, floodwater from rivers or storms, toilet overflow with feces. This is hazardous material. Do not attempt DIY cleanup—call a certified restoration company immediately.
For extraction, professionals use truck-mounted pumps that can remove thousands of gallons per hour. If you’re doing initial DIY extraction while waiting for the pros, use a wet/dry shop vacuum—not your household vacuum, which isn’t designed for water and will short-circuit.
Stage 3: Structural Drying and Dehumidification
This is the stage where most DIY efforts fail. And honestly? It’s where most articles fail too. They’ll tell you to “use fans and open windows.” That advice is dangerously incomplete.
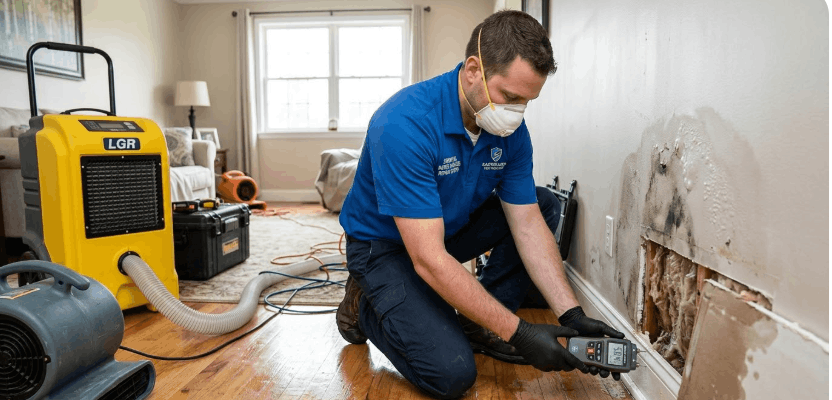
Structural drying requires industrial-grade equipment: LGR (low-grain refrigerant) dehumidifiers, axial fans, and sometimes injectidry systems that force warm, dry air into wall cavities. Restoration professionals use moisture meters to monitor drying progress, aiming for a wood moisture content between 10% and 12%—anything above 16% is a mold risk. On drywall, you want readings below 1% on a pin-type meter.
A residential box fan is not going to cut it. I know that sounds like I’m pushing you toward hiring someone, and honestly, for anything beyond a minor sink overflow, I am. The recommends professional remediation for any area of mold growth larger than 10 square feet. If your structural drying is inadequate, you’ll be well past that threshold within two weeks.
Pro Tip: Ask your restoration company for daily moisture readings and a drying log. Legitimate companies using IICRC S500 protocols will provide this automatically. If they can’t produce documentation, that’s a red flag.
Stage 4: Removal and Demolition of Unsalvageable Materials
Here’s where it gets messy—literally. Materials saturated beyond recovery need to come out. Drywall that’s been wet for more than 48 hours generally can’t be saved. Same goes for carpet padding, particleboard cabinetry, and any insulation that absorbed contaminated water.
The IICRC S520 standard for mold remediation recommends cutting drywall at least 12 inches above the visible water line. Why? Because water wicks upward through capillary action, meaning the moisture inside the wall is always higher than what you see on the surface. Cutting only to the stain line is one of the most common mistakes I see in DIY repairs, and it almost always leads to hidden mold six months later.
Stage 5: Antimicrobial Treatment and Cleaning
Once damaged materials are removed and surfaces are dry, everything needs to be treated with an antimicrobial solution to kill residual mold spores and bacteria. This isn’t a spray-bottle-of-bleach situation. Bleach is actually a poor choice for porous materials like wood framing—it kills surface mold but doesn’t penetrate deeply enough, and the water content in bleach can actually feed mold roots. Professional-grade products like quaternary ammonium compounds or hydrogen peroxide-based solutions are far more effective.
If the water was Category 2 or 3, contents that contacted the water—furniture, clothing, personal items—need to be either professionally cleaned or discarded. Sound extreme? Consider that explicitly state that any porous item saturated by floodwater should be discarded due to contamination risk.
Stage 6: Restoration and Reconstruction
The final stage is putting everything back together. This includes hanging new drywall, reinstalling baseboards, repainting, replacing flooring, and reconnecting any plumbing or electrical that was disconnected during mitigation. It’s essentially a construction project at this point.
One thing most articles skip: clearance testing. Before you close up walls, consider having an independent environmental consultant (not your restoration company—that’s a conflict of interest) take air and surface samples to confirm mold levels are back to normal. This costs $300–$600 but can save you from a much larger problem down the road. Think of it as the home inspection you do before closing on a house.
(Trust me, I learned this the hard way on a rental property I own. Skipped clearance testing to save money. Ended up paying five times that amount eight months later when tenants reported respiratory symptoms.)
DIY vs. Professional Water Damage Restoration: What Actually Makes Sense
I’m not going to tell you that every water damage event requires a $5,000 professional restoration crew. That would be dishonest. But I’m also not going to tell you that a box fan and some towels will handle a burst pipe in your basement. The truth, as usual, lives in the middle.
When DIY Works
Small Category 1 events—a toilet overflow that’s quickly caught, a minor leak under a sink—can often be managed at home if you act within the first few hours. You’ll need a wet/dry vacuum, a couple of fans, a dehumidifier, and a moisture meter (decent ones run $30–$50 on Amazon). Pull up affected carpet, remove saturated padding, and dry aggressively for 48–72 hours. If moisture readings return to normal and there’s no musty smell, you’re likely in the clear.
When You Need the Pros
Call a certified restoration company—look for IICRC certification—if any of these apply: the water is Category 2 or 3, the affected area exceeds 40 square feet, water has been sitting for more than 24 hours, you see or smell mold, or the damage involves structural elements like subfloors and framing. Also call the pros if your homeowner’s insurance is involved. Restoration companies that work with insurance understand Xactimate pricing software and can advocate for appropriate scope, potentially saving you thousands in out-of-pocket costs.
The Equipment Gap Most People Don’t Realize
Here’s something the “best equipment for DIY water damage restoration” articles won’t admit: consumer-grade dehumidifiers remove maybe 30–70 pints of moisture per day. A single LGR commercial dehumidifier? Up to 250 pints. That’s not a small gap—it’s the difference between drying a room in two days versus ten. And remember, every extra day of elevated moisture is another day mold has to establish itself.
The same applies to air movers. A household fan pushes air around a room. An axial air mover creates targeted airflow at high velocity across wet surfaces, dramatically accelerating evaporation. Restoration companies bring six to ten of these per job. You’d need to rent that many from an equipment rental shop, and at that point you’re spending close to what a professional extraction costs anyway.
Insurance, Hidden Damage, and the Mistakes That Cost Thousands
Does Insurance Cover Water Damage from a Burst Pipe?
Short answer: usually, yes—if the failure was sudden and accidental. Standard homeowner’s insurance policies typically cover water damage from burst pipes, failed appliance supply lines, and sudden plumbing failures. What they don’t cover is damage from deferred maintenance, gradual leaks you should have caught, or external flooding (that requires a separate ). Here’s a sobering detail: only about 4% of homeowners carry flood insurance through NFIP, leaving the vast majority to pay out of pocket when floodwater enters their home.
Pro Tip: When filing a claim, request that your insurance company send a third-party adjuster rather than relying solely on the restoration company’s estimate. Some restoration firms have cozy relationships with insurers that don’t always work in the homeowner’s favor. Get an independent assessment.
How to Tell if Water Damage Is New or Old
This matters more than you might think—especially for insurance claims and real estate transactions. New water damage typically shows up as a single, defined water stain with damp or soft texture. The area feels wet to the touch, and the stain has consistent coloring.
Old water damage tells a different story. Look for concentric rings (like a coffee stain that dried and was re-wet multiple times), yellowing or brownish discoloration, bubbling or flaking paint, and warped or sagging materials. If you press on a water-stained ceiling and it feels spongy but dry, the damage likely occurred weeks or months ago. Old damage that was never properly remediated is a huge red flag for hidden mold behind the surface.
Signs of Hidden Water Damage Behind Drywall
This is the stuff that keeps restoration professionals in business. By the time water damage is visible on the surface of drywall, it’s been wet behind the surface for much longer. Watch for these signs: musty or earthy odors with no obvious source, paint that’s bubbling or peeling in patches, baseboards that are pulling away from walls, warped or buckled flooring near walls, and unexplained spikes in your water bill (which may indicate a hidden leak feeding the problem).
A thermal imaging camera—which many restoration companies use during initial inspections—can detect temperature differentials behind walls that indicate trapped moisture. You can rent one for about $50–$100 per day, or hire a home inspector who owns one. It’s the single most effective tool for finding damage you can’t see.
What the Experts Say
Brandon Burton, a certified IICRC Water Restoration Technician and operations manager at a mid-size restoration firm in Denver, puts it bluntly: “The biggest mistake homeowners make isn’t the water itself—it’s underestimating the moisture they can’t see. We pull moisture readings from walls that look perfectly dry on the surface but are reading 30% or higher inside. That’s a mold factory waiting to happen.”
His advice? “Get a moisture meter before you need one. A $40 pin-type meter from any hardware store will tell you more about your walls than your eyes ever will. Check behind your fridge, under your sinks, and around your water heater every three months. Five minutes of inspection can save you five figures in restoration costs.”
Frequently Asked Questions About Water Damage Repair
Can I just let water damage dry on its own?
No. Without active drying—dehumidification and forced airflow—materials will retain moisture for far longer than the 24–48 hour window before mold begins growing. Even if surfaces feel dry to the touch, trapped moisture inside wall cavities can sustain mold growth for weeks. The EPA recommends professional drying for any area that can’t be completely dried within 24 to 48 hours.
How much does professional water damage restoration cost?
Costs vary widely based on the severity of damage, water category, and size of the affected area. Minor water extraction and drying for a single room may run $1,500–$3,000. A full-home restoration involving demolition, mold remediation, and reconstruction can exceed $20,000. The average insurance payout for water damage claims currently sits above $11,000. Get at least two estimates and make sure both companies are IICRC-certified.
How long does it take for mold to grow after water damage?
Mold spores can begin colonizing damp surfaces within 24 to 48 hours. Visible mold growth typically appears between 18 and 21 days if the area hasn’t been dried, though favorable conditions (temperatures between 77°F–86°F and humidity above 60%) can accelerate that timeline. Acting within the first 24 hours is critical to preventing a mold problem.
What should I do immediately after a water leak in my house?
Shut off the water source, then the electricity to affected areas. Document the damage with photos and video before cleaning anything. Begin extracting standing water with a wet/dry vacuum. Open windows and run fans and a dehumidifier. Contact your insurance company and a certified restoration professional. Do not walk through standing water near electrical outlets.
The Bottom Line: Speed Wins
Water damage repair isn’t complicated in theory. Shut off the source, remove the water, dry the structure, kill the microbes, rebuild what’s been destroyed. But in practice, it’s a race against the clock—and the clock started the moment water touched your floor.
The single most important takeaway from this entire guide? Act within the first 24 hours. Every decision you make in that first day—documenting damage for insurance, classifying the water, starting extraction, calling a professional—compounds in your favor. Every hour of delay compounds against you.
Water damage affects 44% of homeowners at some point. You don’t get to choose whether it happens. But you absolutely get to choose how you respond. And now you know exactly what to do.